


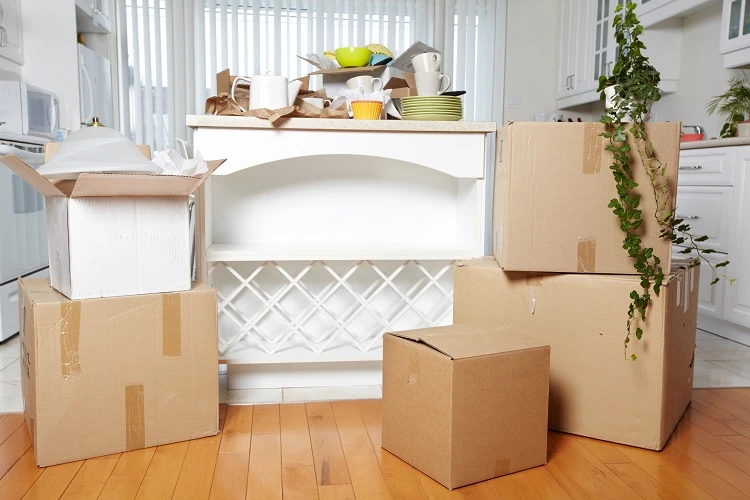
The kitchen is one of the hardest rooms to pack during a move. Between breakable dishes, strange-shaped tools, and bulky appliances, it takes real planning to get it right.
Here’s the deal: whether you're moving locally or preparing for a long-distance move, smart prep makes packing your kitchen faster, easier, and way less stressful. With a few solid tips and the right gear, you can pack everything safely and stay in control. Let’s break down how to pack kitchen items for moving the right way.
1. Start with a Game Plan: Timeline, Zones, and Inventory
If you want a smooth process, start packing your kitchen early and stick to a system. For most family kitchens, three to four weeks is enough time to sort, wrap, and pack everything without losing access to what you still need.
Work through the kitchen in small chunks; start with the pantry, then small appliances, then move to pots and pans. This keeps you from getting overwhelmed. And don’t skip the moving checklist. Tracking what’s packed and what’s still out keeps you focused and makes it easier to handle fragile or bulky items.
2. Gather Essential Packing Supplies for Your Kitchen Move
Having your supplies ready makes the whole process smoother. Most kitchens need more paper, boxes, and padding than people expect, especially if you're packing up glass, ceramics, or odd-shaped tools.
A standard kitchen move requires:
- Small boxes (10-15): Ideal for dense, heavy items such as canned goods, small appliances, and cast iron cookware.
- Medium boxes (10-15): Versatile containers suitable for pots, pans, and kitchen gadgets.
- Large boxes (5-7): Perfect for lightweight but bulky items like plastic containers and baking sheets.
- Dish packs/heavy-duty boxes (3-5): Reinforced construction specifically designed for plates, bowls, and fragile items.
- Packing paper (15+ lbs): Essential for wrapping glassware, dishes, and filling empty spaces.
- Bubble wrap: Provides superior protection for particularly fragile items and irregularly shaped pieces.
- Packing tape & dispenser: High-quality, durable tape ensures boxes remain sealed throughout transport.
- Permanent markers: Clear labeling simplifies the unpacking process and identifies fragile contents.
For a more precise calculation of required supplies based on your specific kitchen size, the moving box calculator offers customized estimates for your situation.
3. Be Selective: What Stays and What Goes
Before boxing up every corner of your kitchen, take a hard look at what actually belongs in your new space. Most kitchens are cluttered with duplicate tools, dusty gadgets, or single-use appliances that haven’t been touched in years.
Be honest about what you use. If something’s been sitting untouched for over a year, it probably doesn’t need a spot in the moving truck. When figuring out what to keep or toss, use this simple guide:
- Keep: Everyday tools you rely on, reliable appliances, and items you use often or truly care about.
- Donate or sell: Extras, working appliances you don’t use, and kitchenware that no longer fits your needs or style — non-perishable foods can usually be donated to a local food bank.
- Discard: Some items to leave behind are expired food products and spices, mismatched storage containers, damaged dishware, non-functional appliances, and impulse-purchase gadgets that failed to deliver promised convenience.
Getting rid of clutter now means less to pack, cheaper moving costs, and an easier time settling into your new kitchen.
4. Pack Your Kitchen Step-by-Step
With your supplies gathered and unnecessary items removed, it's time to start the actual packing process. If this feels overwhelming, remember that professional packing services are always an option for those with limited time or physical limitations.
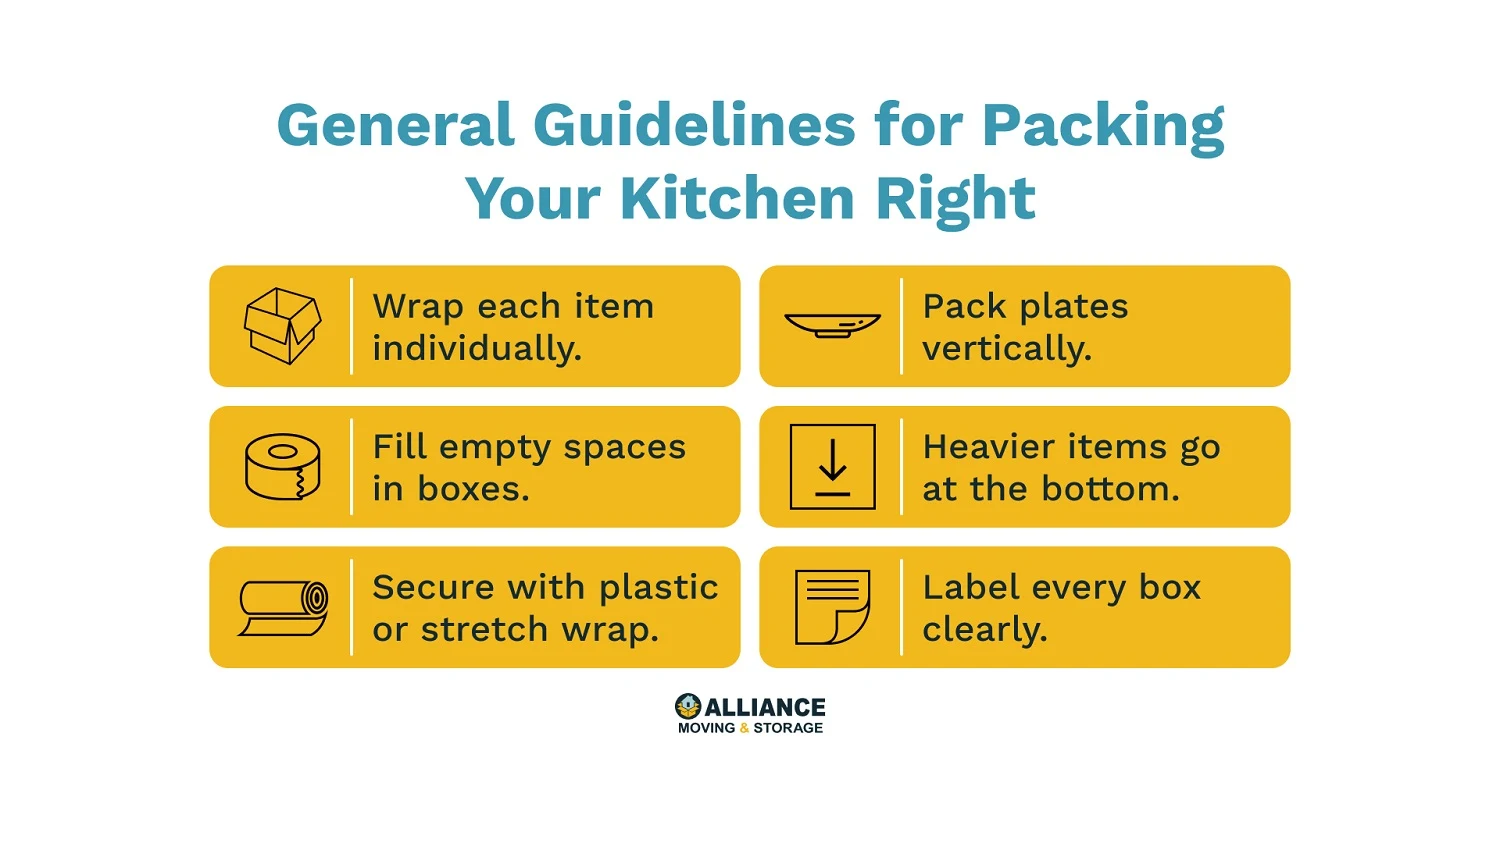
Dishes, Plates, and Bowls
When you pack dishes, always position them vertically in boxes like records, not stacked flat. This reduces pressure and prevents breakage. Wrap each plate individually with packing paper, using a few sheets per item. For additional protection, wrap multiple plates together after individual wrapping. Place them on their edges in a dish pack box lined with crumpled paper, and fill all empty spaces with more crumpled paper. Never leave room for items to shift during transit.
Glassware and Stemware
Glasses need extra care. Fill them with crumpled paper, then wrap the whole glass tightly. For stemware, wrap the stem first, then the bowl, and place them upside down in sectioned boxes if available. Never stack glassware. Always pack them side by side with padding between each item. Mark these boxes clearly as FRAGILE on every side.
Pots, Pans, and Lids
To pack pots and pans the right way, nest smaller ones inside larger ones with packing paper or kitchen towels in between to keep surfaces from getting scratched. Wrap any glass lids on their own using bubble wrap or several layers of paper, then tape them up tight. Load your heaviest cookware on the bottom of a medium box, add lighter items on top, and fill in the extra space with towels or mitts so nothing shifts around.
Flatware, Utensils, and Knives
Keep flatware sets in their trays and wrap them in plastic wrap so they stay together. For loose utensils, group similar items and hold them with rubber bands. Knives need extra care — wrap each blade with a few sheets of paper, then wrap the whole knife in a dish towel and tape it up. Make sure to label any box with sharp items so no one gets hurt when unpacking.
Food Items and Pantry Goods
Pack unopened dry goods and canned food in small, strong boxes that won’t break or buckle. Transfer anything in glass containers — like spices or grains — into plastic or bags to cut down on weight and avoid messes. Toss anything perishable unless you're making a quick move with a cooler. If you’ve got unopened food you won’t use, local food banks will often take donations.
Small Appliances
If you still have the original box, that’s your best bet for packing small appliances. If not, wrap each one in bubble wrap and tape it up well. Use twist ties to secure cords and tape them to the appliance itself. Keep the instruction manual in the box if you have it, and stuff any gaps with paper so the appliance won’t shift during the move.
Large Kitchen Items
When packing large appliances like refrigerators and ovens, timing is crucial. Defrost refrigerators 24-48 hours before moving day and disconnect gas appliances at least a day in advance. Clean all appliances thoroughly, remove or secure movable parts, and keep doors shut with tape during transport. For professional handling of heavy appliances, consider specialized loading services to prevent injury and damage.
5. Create and Pack Your Kitchen Essentials Box
This is the one box that keeps you sane while everything else is in chaos. Think of it as your short-term kitchen — something you can reach for on your last day in the old place and the first few days in the new one. Pick a sturdy box and don’t bury it under the others.
Here’s what to include:
- 1 plate, cup, and set of cutlery for each person
- 1 go-to pot and one reliable pan
- A few small appliances, like a toaster or coffee maker
- Dish towel, soap, and a basic sponge
- Quick breakfast items or snacks from the pantry
- A kitchen knife (wrapped safely), paper towels, and a few plastic bags
With this box nearby, you can cook simple meals, have coffee in the morning, and ease into your new kitchen without scrambling to unpack everything on day one.
Making Your Kitchen Move As Smooth As Possible

Packing your kitchen might seem like a giant task, but it’s completely doable with the right prep. Start early, stay organized, and don’t pack anything you don’t really need. With good packing habits and a clear plan, you’ll be cooking in your new space in no time.
As a trusted Chicago moving company serving the entire Chicagoland area, Alliance Moving & Storage offers comprehensive services including packing, loading, transportation, and unpacking. Our experienced team understands the challenges of kitchen packing and can help make your move easier. Contact us today for a free quote and discover how our professional movers can take the stress out of your next relocation.


.jpg)